The name of the
season is “fall”, not “fail.”
Failure can loom nearby with your lawn and garden – and the tools you use to care for them – once the
air turns brisk and leaves turn. With
the winter season approaching, now is the time to perform equipment maintenance
and give your lawn some special care before temperatures plummet and winter grabs
hold.
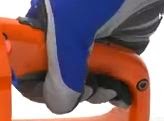
Aeration
Here in Georgia, fall is the perfect time to aerate
your warm-weather-grass lawn. This is especially true in yards that receive heavy foot traffic
throughout the summer. The simple aeration process -- punching holes through
the grass thatch layer -- is vital to maintaining a healthy lawn, because it
allows water, air and nutrients to more easily reach the root system.
You can tell when a
lawn does not get aerated regularly. It grows slower, has more shallow root
systems and is much more susceptible to insects and disease. Aeration brings
more oxygen into the lawn, which helps break down the thatch that forms over
the summer – thus allowing the lawn to absorb more water. And once aeration is
performed, the time is right to reseed patchy areas so they will be thick and
green by spring.
Two types of
equipment are typically used for aeration – either a spike aerator, which
punches holes in the sod; or a plug aerator, which removes small plugs of soil
from the lawn. Both can be effective; come see us for more information.
Aerators can be
rented, but you may want to purchase one if your lawn needs more frequent
aeration. Husqvarna offers several types of compact, easy-to-use and
ergonomically-designed aerators that are engine-powered or towable. We also carry locally manufactured aerators to pull behind a tractor, mower, or ATV.
Maintenance
The change of seasons
is the perfect time to make necessary adjustments to your mower, trimmer,
chainsaw or other lawn/garden equipment. Preventative maintenance is key to saving time and money. During this down time of the slow season, go ahead and inspect all the moving pieces and parts on your machine such as belts, blades, screws and chains. You'll also want to be sure to change or clean filters, oil, and plugs. Or for an even easier maintenance experience, just bring your equipment to Red Top Mower for a service!
Fuel for Fall … and
Winter
As you wind down from the busy season of weekly lawn and garden maintenance, you can begin preparing your machines for winter. Be sure to run a product like seafoam through each machine. These products eliminate garbage inside the fuel tank, carburetor and engine. Try to dump the fuel before storing the machine over the winter, or run it until it completes uses all of the fuel. If you leave any fuel in the machine it is absolutely necessary to include a stabilizer in your fuel tank to be sure your engine doesn't become clogged as it sets. All of these products, as well as more information, are available on our showroom counter.
These and other tips will make fall a
successful time for your lawn and the equipment that cares for it. Next spring when everything turns green again, you'll thank yourself for your preventative maintenance. A few minutes this fall may well save you countless hours and dollars come spring time!


